
What is Ironclad and how is it set up?
Ironclad is a digital contracting platform that connects the people, processes, and data involved in business contracts so companies can execute smarter agreements, faster. Ironclad’s contract management platform unlocks operational efficiency, streamlines cross-functional collaboration, and minimizes risk. It also facilitates every process required for contract generation, negotiation, approval, signature, and storage.
Scattered emails and communications are major blockers in our increasingly interconnected world. Decisions involving multiple stakeholders need to be made quickly and with the latest shared information. Our digital contracting platform makes collaboration and negotiation frictionless and productive.
Business moves faster every day, so new contracts and processes need to be launched and updated in minutes, not months. Digital contracting enables agile, adaptable support for contracting across the business. Ironclad’s no-code Workflow Designer makes it easy for any team to design and deploy automated approvals and business processes.
Use digital contracting to unlock the critical business intelligence that lives within contracts. With our centralized, searchable Dynamic Repository, teams can answer questions about their agreements in seconds. The Ironclad contract lifecycle management tool (CLM) offers simple and intuitive experiences at every touchpoint for business users, administrators, and counterparties.
Salesforce Integration Components
Salesforce authentication and data transfer consist of three main components:
- Service Account: Your service account is responsible for Workflow Sync to create/write updates to the Ironclad Workflow object and Record Sync object creates/writes/reads/edits. We highly recommend using a generic service account, instead of an individual-named user license.
- Individual Accounts: Individuals must connect their Salesforce accounts in order to use Workflow Launch. This is used to read information from mapped Salesforce fields and fill in launch form information. It also respects any permissions the user has in Salesforce, which can result in errors, such as Pull from Salesforce failing.
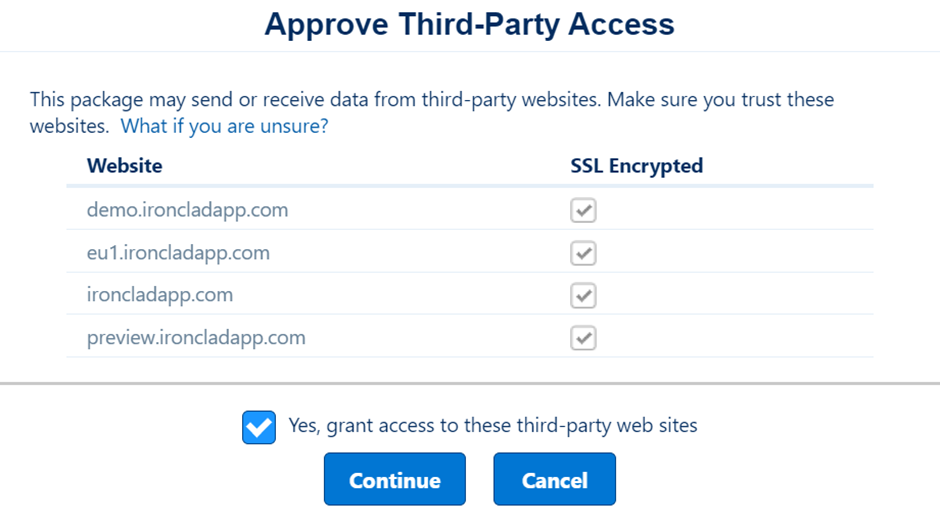
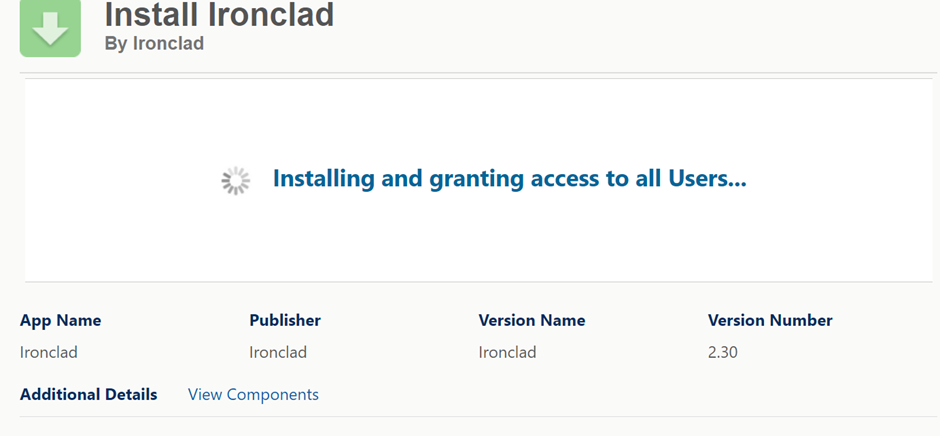
- Managed Package: You can install Ironclad’s Managed Package to your Salesforce instance, which consists of five Custom objects. These objects are used to receive structured information about the contracting workflow in Ironclad as it progresses through the steps. We highly recommend that you Install it for All Users to make sure that there are no permissions issues
Ironclad Installation:
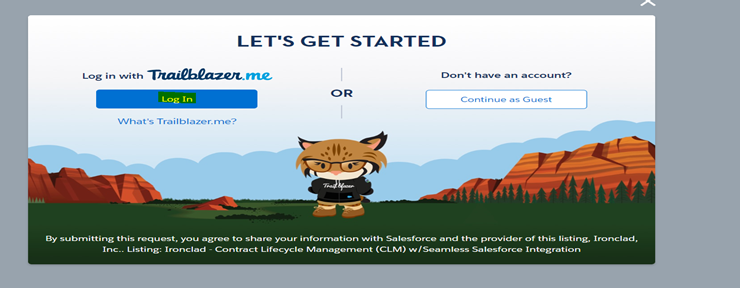
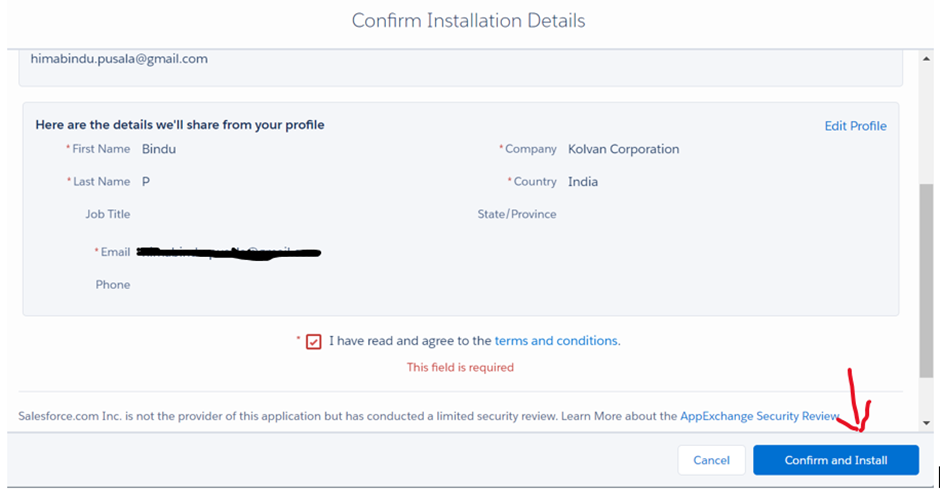
Steps to integrate Ironclad CLM with Salesforce:
Go to “Salesforce AppExchange Marketplace” and search Ironclad CLM in the search


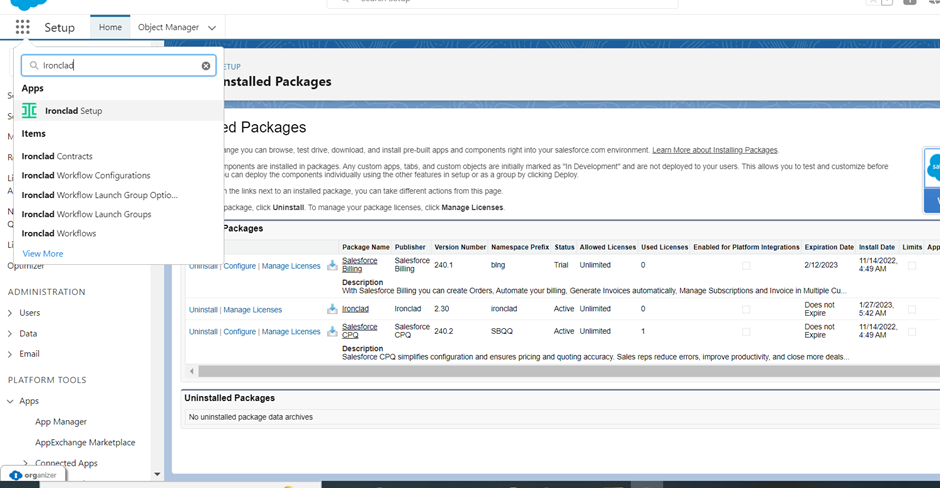
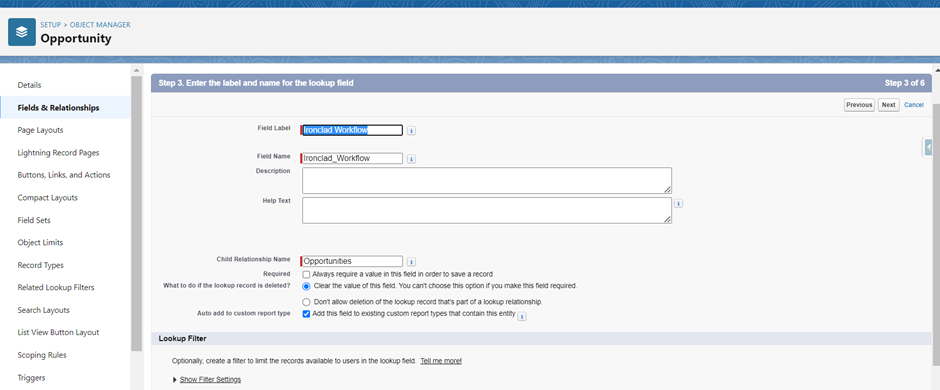
After you’ve installed Ironclad’s Managed Package, you also need to create the following field in your Salesforce instance:
- Custom Lookup Relationship field type on Salesforce object, such as Account or Opportunity, to Ironclad Workflow.


Service Account Requirements
The service account does not need system admin privileges in Salesforce, but needs create/read/write/create permissions on objects, depending on your integration setup, such as Account, Opportunity, Quote, Ironclad Contract, etc. It is required to have the following:
- API enabled
- Field Level Security read/write on the Lookup Relationship fields to the custom Ironclad Workflow object on Account, Opportunity, etc.
- Field Level Security read/write and on any field mapped in Workflow Launch configuration, such as Counterparty Name Counterparty Signer Name, Counterparty Signer Email
- Record sharing to any and all qualifying Salesforce records used in the integration
Integrations:
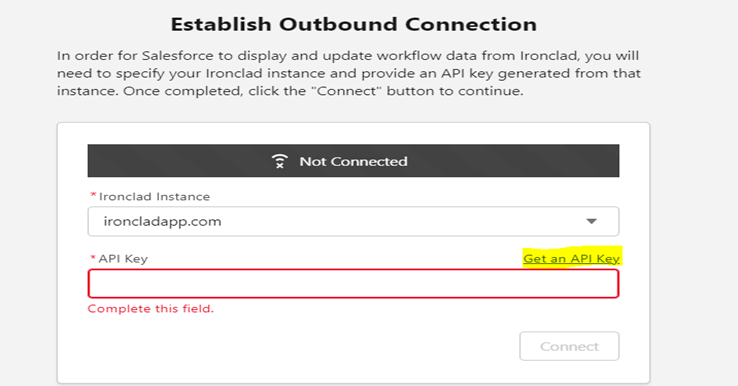
Connect Salesforce Logins to Ironclad

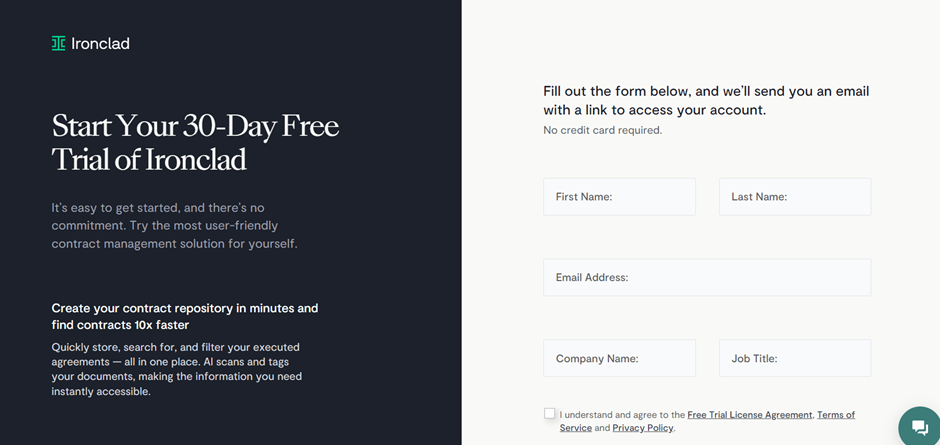
Create an Ironclad Account:
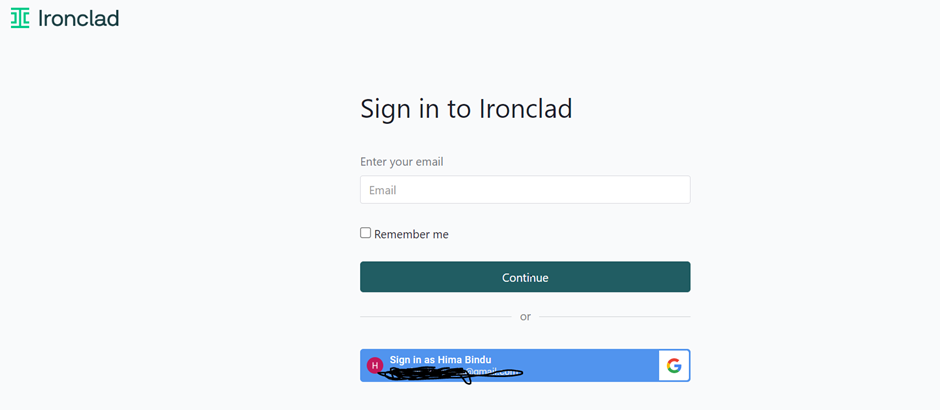
To create an Ironclad account, Please click on below link for free trial pack.https://ironcladapp.com/lp/free-trial/
Ironclad’s Salesforce Integration Features
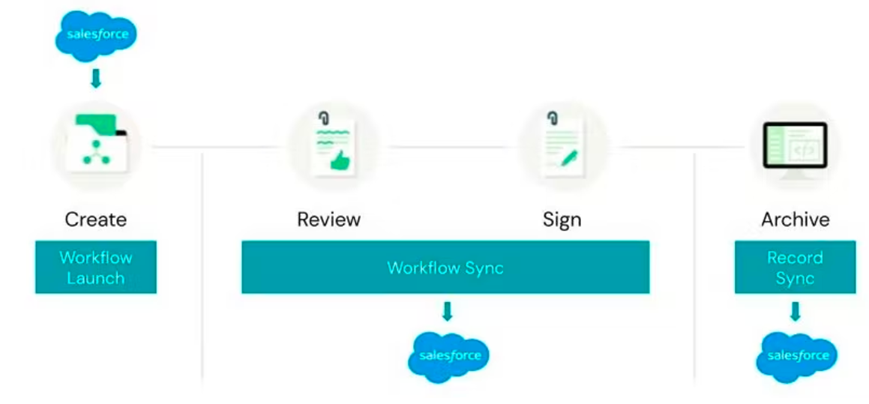
Ironclad’s Salesforce Integration consists of three features:
1. Workflow Launch allows an Ironclad user to create a contract by filling Ironclad launch forms with data pulled from Salesforce, either to launch a workflow or update it if information in Salesforce changes. Workflow Launch can also be leveraged by building a button in Salesforce to redirect users to Ironclad with the launch form pre-filled. Workflow Launch can pull from standard or custom objects.
2. Workflow Sync provides visibility into the progress of a workflow in Ironclad directly in Salesforce using the Ironclad Workflow object. Workflow Sync requires the installation of the Ironclad Managed Package.
3. Record Sync pushes completed contracts from Ironclad (including the associated metadata and, if desired, the signed PDF) to a Contract object in Salesforce. If applicable, Record Sync can also update existing Salesforce objects, such as fields on an Opportunity, or create new Salesforce objects, such as a new Contact with the signer’s name, title, and email.
The Salesforce integration is compatible with both Salesforce Classic and Salesforce Lightning.
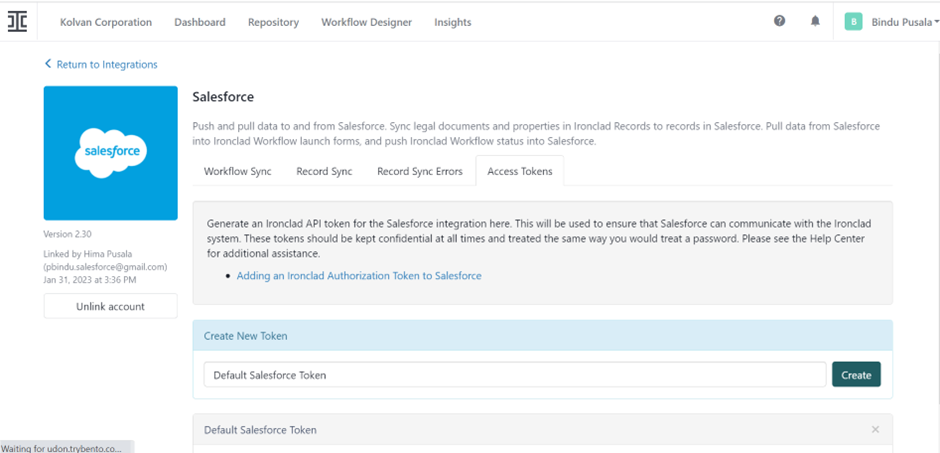
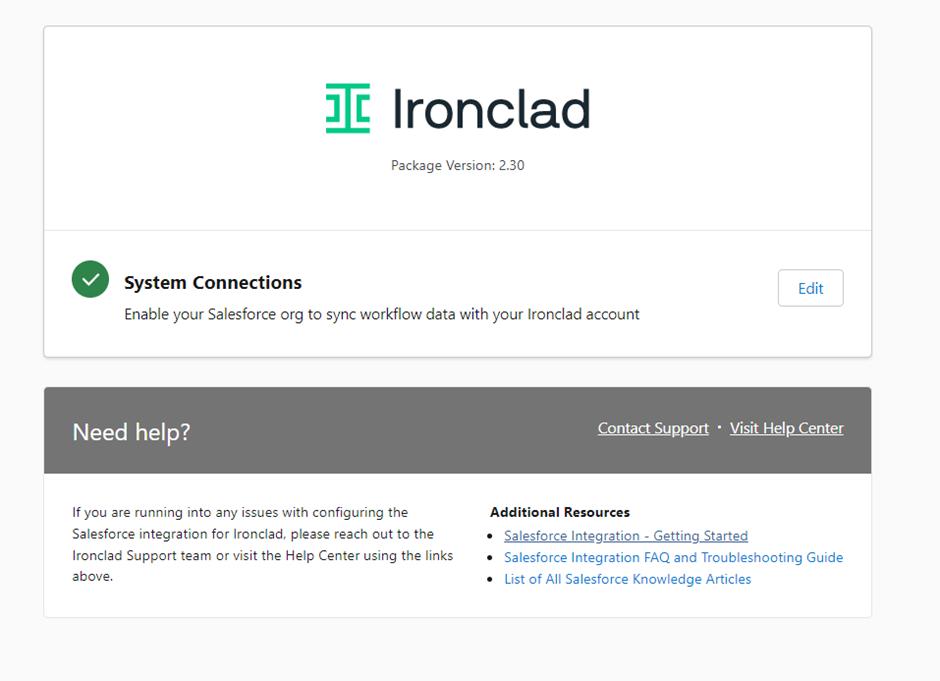
To access the Salesforce configuration in Ironclad, click on your name located in the top right corner. Navigate to Company Settings > Integrations > Salesforce. This page shows all of your currently configured integrations.
Integration Requirements
To integrate your Salesforce instance with Ironclad, you need the following:
- Administrator privileges in Ironclad. If you don’t see Company Settings, you may not be an administrator. For admin privileges, contact a member of your legal team who is responsible for your Ironclad deployment.
- One of the following Salesforce editions:
- Professional
- Enterprise
- Unlimited
- Force.com
- Developer
- Performance
- A Salesforce account to link to Ironclad:
- In Ironclad, click on your name located in the top right corner of Ironclad. Navigate to Company Settings > Integrations > Salesforce > Workflow Sync.
- Click Add Workflow Configuration, and then select Enable Sync to the Ironclad Workflow Object.
- Click Edit Workflow Sync Settings.
Workflow Sync:

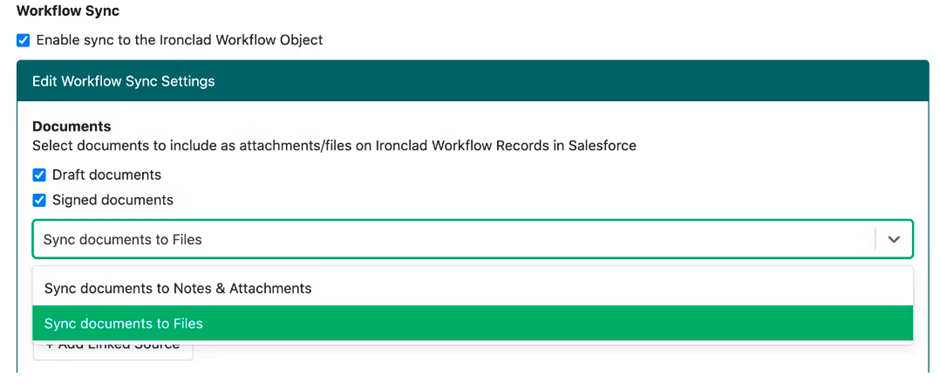
- If you want to sync your draft and signed documents back to the Ironclad Workflow object in Salesforce, set up your workflow sync with documents. To do this:
- Select whether you want Draft documents and/or Signed documents to sync.
- From the dropdown, select whether you want to Sync documents to Files or Sync documents to Notes & Attachments (default).
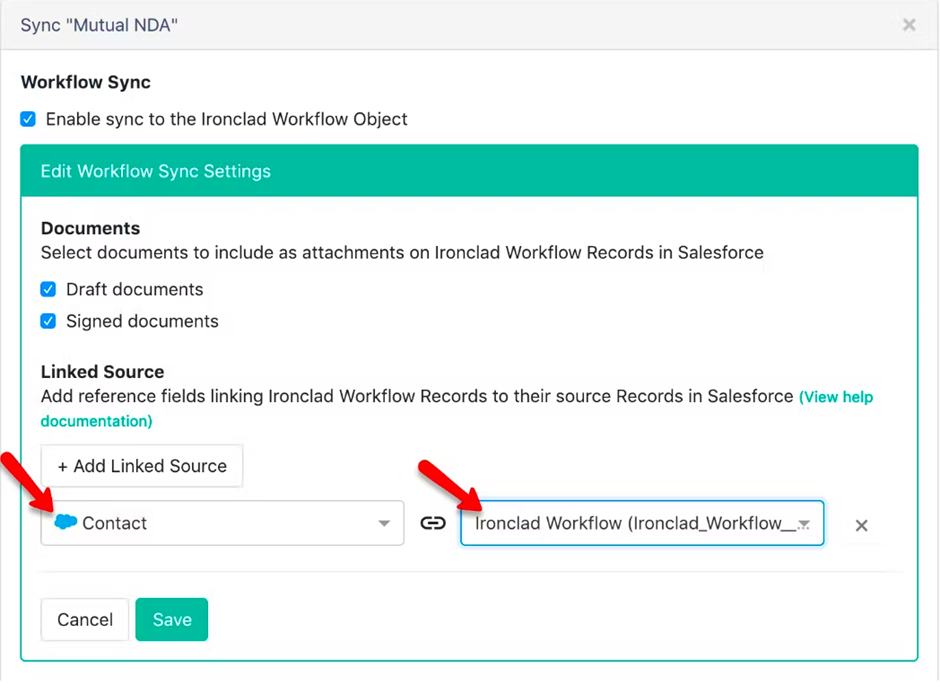
- If you want to select which Salesforce object, you’d like to link your workflow to, set up your workflow sync with a linked source. To do this:
- Click Add Linked Source.
- From the dropdown on the left, select the Salesforce object you want to link the workflow to.
- From the dropdown on the right, select the custom Lookup Relationship type field you created.
- A link is added directly to the source Salesforce Record from the workflow in Ironclad AND a link is populated in your Ironclad Workflow custom field in Salesforce.
Configure Your Workflow to Launch from Salesforce:
Required Ironclad Permissions: Admin
If you have any questions about matching the Ironclad Workflow Attributes to your Salesforce fields, reach out to Support.
You can allow your users to automatically pull data from Salesforce when launching workflows in Ironclad. There are two ways to configure this:
- Pull from Salesforce button on the workflow launch form in Ironclad.
- Custom buttons/links to an Ironclad workflow in Salesforce.
- Click on your name located in the top right corner of Ironclad. Navigate to Company Settings > Integrations > Configure Salesforce > Workflow Launch.
- Specify which data Ironclad should pull from Salesforce.
- In the dropdown at the top, select the Salesforce object you’d like to pull data from into your Ironclad workflow. For example, for an NDA, it is likely an Account object.
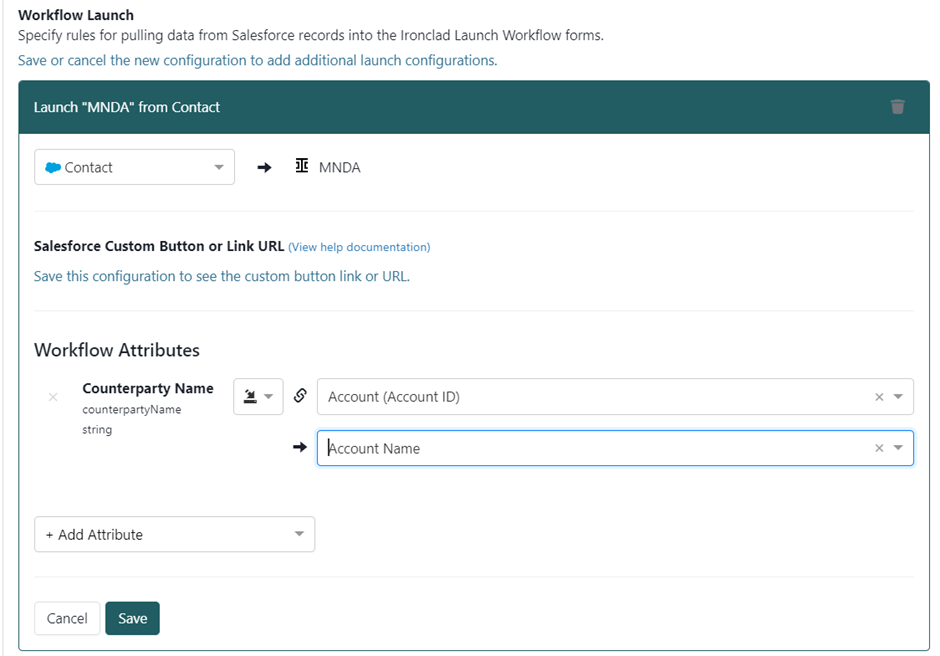
- On the left, add Ironclad Record Properties and map them to Salesforce fields on the right. Make sure the workflow attributes identically match. For example, a string field in Ironclad must match to a string field in Salesforce. The table below shows a list of field types in Ironclad and they can be mapped to in Salesforce.
| Ironclad | Salesforce |
| Boolean | Boolean |
| Date | date, datetime |
| Number | double, int, percent |
| String | id, string, textarea, URL, phone, email, picklist |
| Address | Address |
| monetary_amount | Currency |
| Array | picklist (multi) |
- Optional: Select additional linked Salesforce objects. Additional objects must have a lookup relationship to the main object. In the image below, the linked Account object is selected to pre-populate Ironclad’s Counterparty Name with an Account Name.

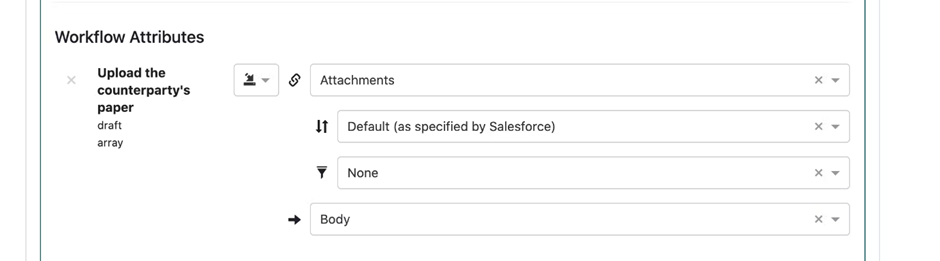
3. If you select Attachments, select the following configuration:
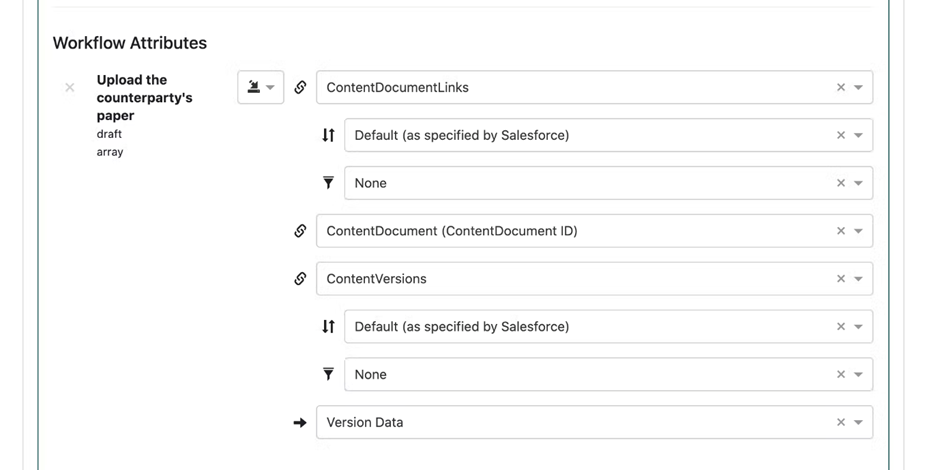
4. If you select Files, select the following configuration:
5.Click Save. Ironclad generates a unique link and a Pull from Salesforce button on the workflow launch form in Ironclad. You can now create a new button in Salesforce. Use the unique link to connect Salesforce to Ironclad.
Configure Custom Buttons/Links in Salesforce
Required Salesforce Permissions: Admin
You can add a custom button to Salesforce pages to automatically launch an Ironclad workflow from Salesforce
- Click on your name located in the top right corner of Ironclad. Navigate to Company Settings > Integrations > Configure Salesforce > Workflow Launch.
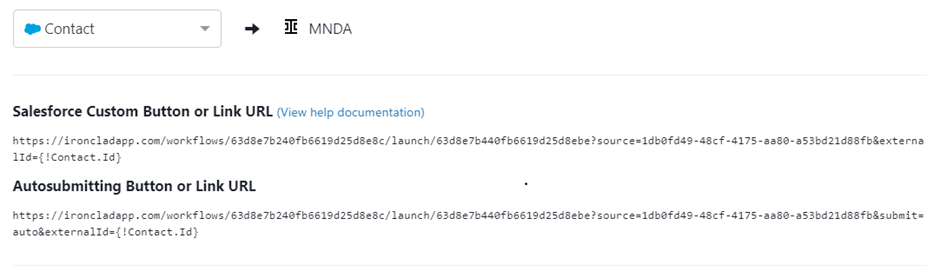
- Each configured workflow provides you with two options to use as part of your workflow launch button in Salesforce. Use the one that best suits your situation:
- Salesforce Custom Button or Link URL. This option redirects the user to an Ironclad launch form, allowing them to manually enter any additional data and then launch the workflow. This is the better option if data might need to be changed by the end-user before submitting or if not all the data needed in the launch form is passed from Ironclad.
- Auto submitting Button or Link URL. If all required launch form fields are being imported from Salesforce, you can use this option to launch Ironclad workflows. Custom buttons using this URL attempt to auto-submit the launch form as soon as the data is pulled in from Salesforce. The user is then taken straight to the workflow in Ironclad without having to press submit. In order for the auto-submit to complete, all of the required fields must be correctly mapped from Salesforce.
Create a Custom Button (Lightning)
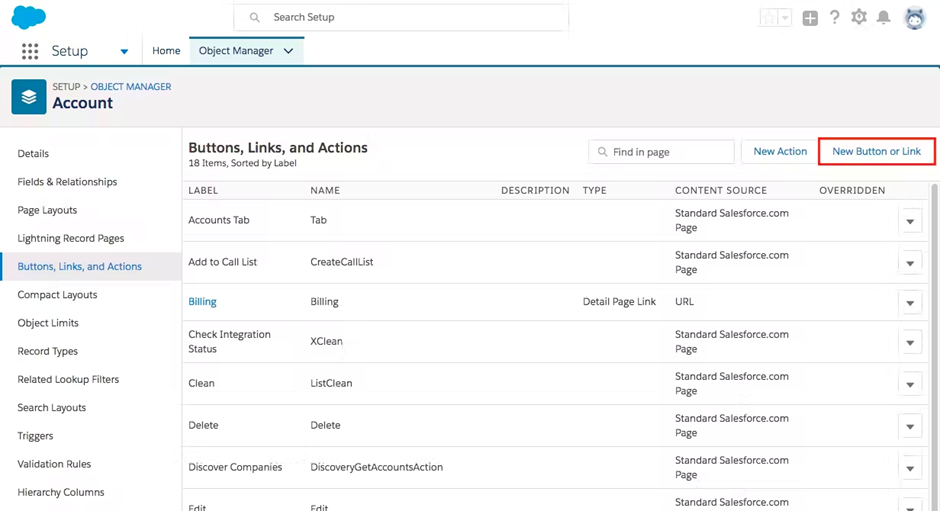
- In Salesforce, click Setup > Object Manager > Buttons, Links, and Actions and then select which Salesforce object you’d like to add the custom button/link to.
- Click New Button or Link. The Salesforce object you add the custom button to must be the same Salesforce object type as the one you use to create the workflow launch configuration in Ironclad.
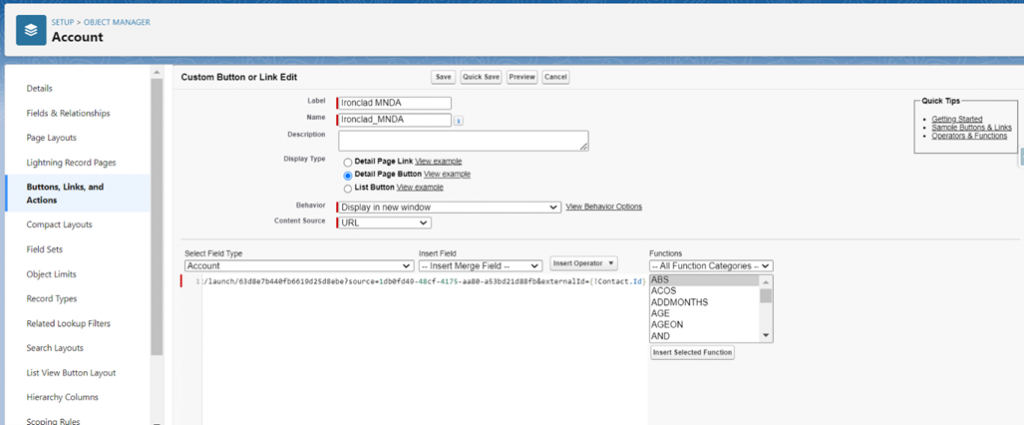
3. Enter /Select the following values
- In the Label field, enter a name similar to Start NDA in Ironclad.
- In the Display Type section, select Detail Page Button.
- From the Behavior dropdown, select Display in new window.
- From the Content Source dropdown, select URL.
- From the Select Field Type dropdown, select the Salesforce Object Type for the configuration.
- In the large text area, copy and paste the Salesforce Custom Button or Link URL from the Ironclad Workflow Launch page.
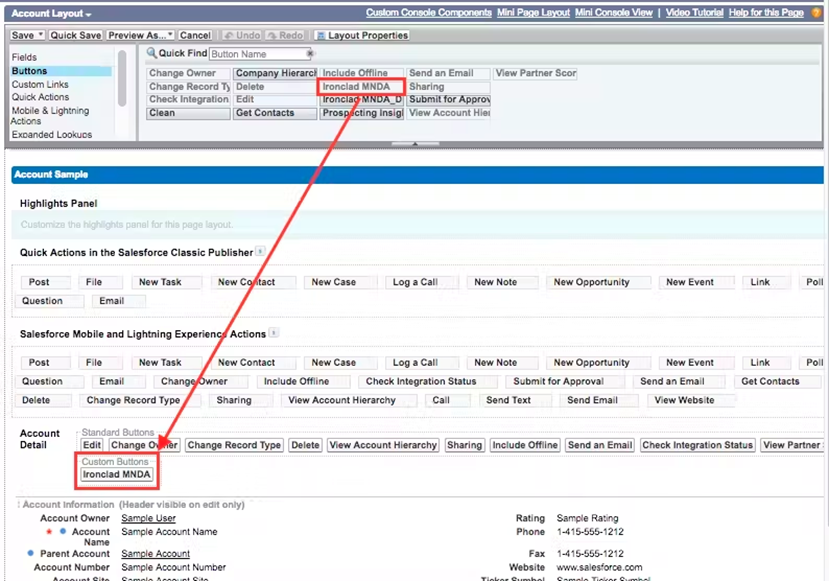
4. In Salesforce, click Setup > Object Manager > Page Layouts and then select which Salesforce object you’d like to add the custom button/link to.
5.Locate the custom button or link that you created. If you created a custom link, it is located under the Custom Links tab. If you create a custom button, it is located under the Mobile and Lightning Actions tab.
6.Drag it into the Account Sample panel where you want it to show in the interface. We recommend adding it to the front of the interface so it’s easier to find. Click Save.
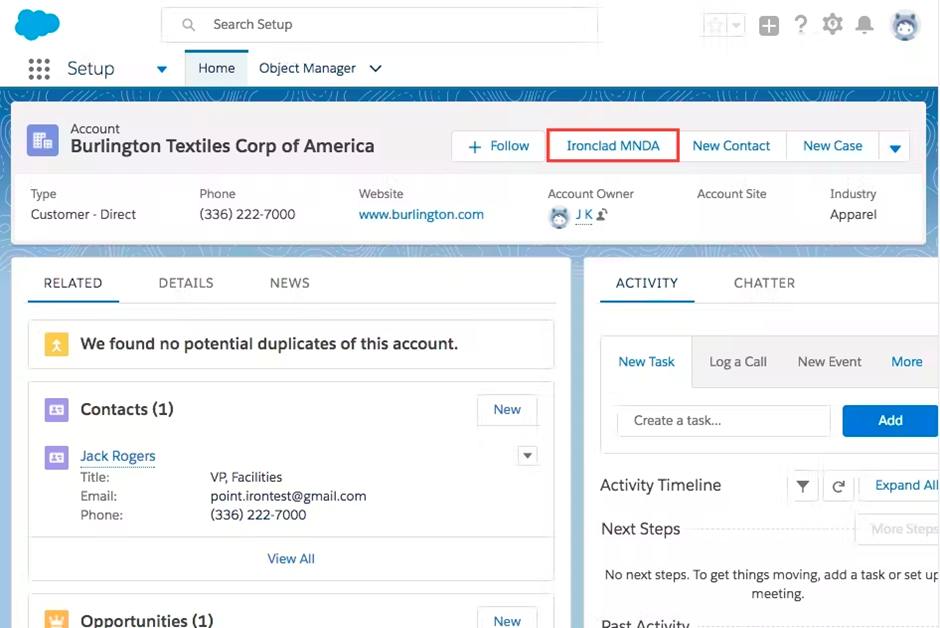
7. If you created a custom button, when users view a Salesforce Account type object (or whichever object type you created your custom button/link for), they see a custom button linked to creating a workflow in Ironclad that auto-fills the form with data from a Salesforce object. If they click the button, a new window redirects them to an Ironclad workflow launch form, populated with values from the Salesforce object.

8.. If you created a custom link, your users can find it under the Details tab at the bottom of the page.
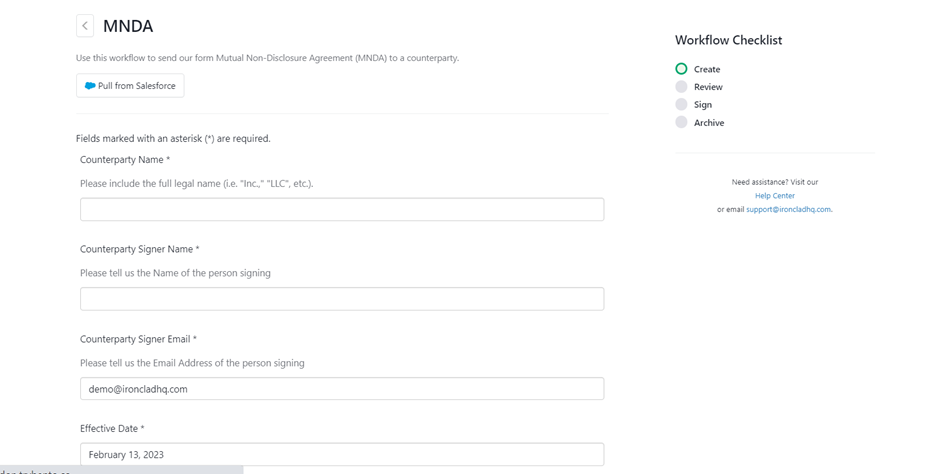
Either you can provide the details manually or you can pull from Salesforce.
Once you configure in Salesforce how a workflow can be launched, your users see a Pull from Salesforce button on their workflow launch forms. Users are prompted to link their Salesforce account before they can use this functionality.
When a user clicks this button, they can search objects in Salesforce and automatically fill in the workflow form with values from the Salesforce object they select, based on the configuration you created in the previous steps.