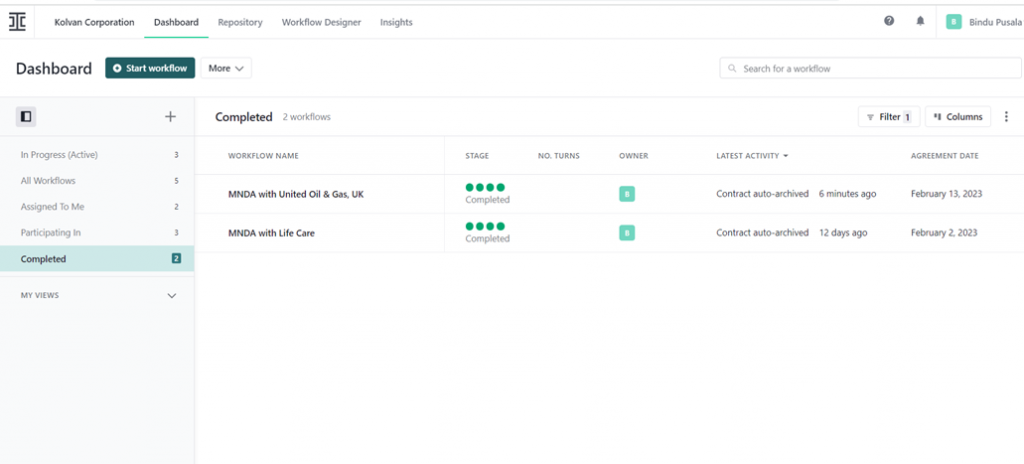
Ironclad dashboard and workflows
The Ironclad dashboard is where you navigate, manage, and prioritize your contract workflows. The dashboard is highly customizable and allows you to search, filter, and sort your workflows by using all available contract metadata. You can then save the filtered and sorted reports as custom views so you don’t have to repeatedly search for the same criteria. You can also share these reports and custom views with your peers for collaboration.
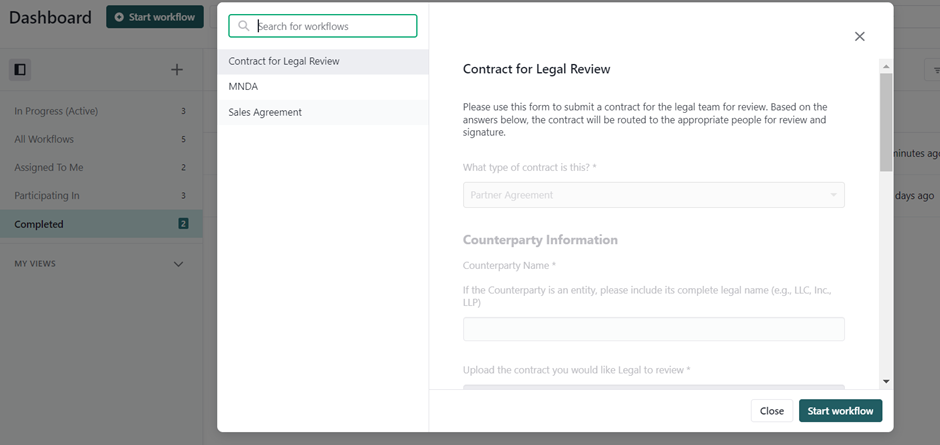
Start a Workflow
The start workflow button enables you to begin a workflow. To begin a workflow, click Start Workflow and hover over the workflow template name to preview the form. If this is the workflow you want to create, click Start Workflow. The workflow launches and allows you to enter the information needed to initiate the agreement.
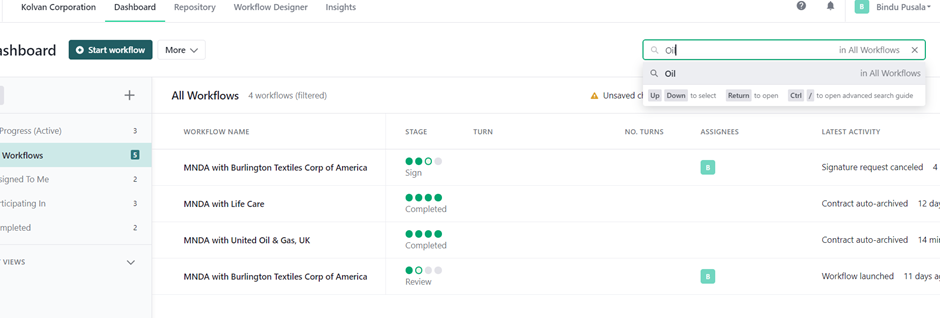
Search :
The search bar enables you to search for workflows based on their title or contract metadata (excluding emails). You can search for a workflow across all of your workflows, or within a filtered view. The search bar supports partial matching and is not case sensitive. For example, if you type son, you will see results such as Johnson and Sonny.
To begin searching, type what you are looking for in the search bar and hit Enter. By default, this will search all workflows. If you want to perform a search within a filtered view, type what you are looking for in the search bar. In the dropdown below, select the search with the name of the filtered view you want to search within.
Dashboard Filtering
The filters dashboard provides you with a robust way to search your workflows for system data and metadata.
Basic Filtering
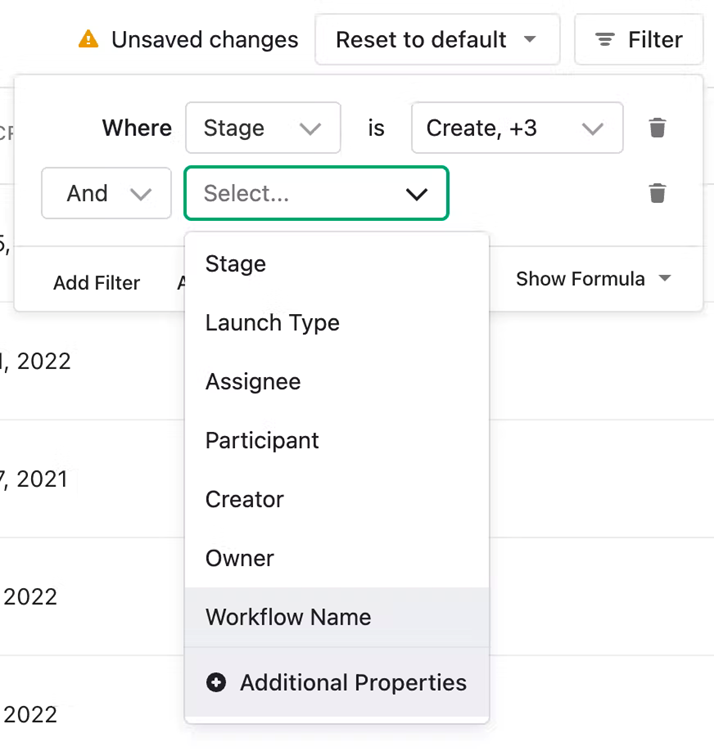
To start filtering, click the filtering dropdown and then click Add Filter. Select a filter from the dropdown. By default, there is system data that you can filter by.
After you select a filter, you need to select a condition for that filter. Conditions are dynamic to the data type of the filter.
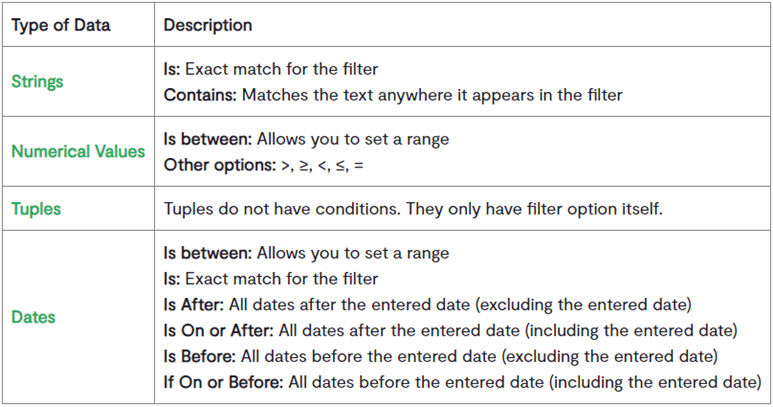
After you select a filter condition, you can select the filter itself. Begin typing and the filters autocomplete helps you find a list of matching filter options along with the number of contracts that each option maps to.
Conditional Statements
You can also add additional filters by using AND/OR statement to chain the filters.
Note: If you switch a top-level statement, all of the statements below it will also be updated. If you want to chain together multiple filters
Advanced Filtering
In addition to basic filtering where you can chain together multiple filters with AND/OR statements and use the system data, you can also filter on contracts metadata by clicking Additional Properties.
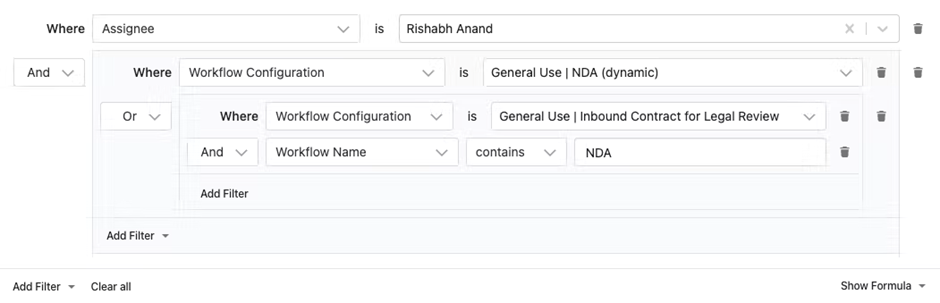
Filter Groups
You can create nested groups of filters to perform complex searches of their workflows. Filter groups enable you to build queries that can chain different conditions together. For example, you can build a search to show ‘All workflows assigned to me AND that have an MNDA contract type OR inbound contracts AND have ‘MNDA’ in their name.’ This query will help you fetch all MNDAs that are assigned to you, irrespective of whether they were generated internally or inbound agreements.
Views
Views are a combination of saved filters and columns that allow you to easily access relevant workflows without having to manually search each time.
The Views panel is located on the left. You can open or close it by clicking the Views icon located by All workflows.
Repository:
You can access your Ironclad Repository through the Repository tab. If you are an Admin, you will have full access. Otherwise, your access will depend on the permissions your Admin has configured.
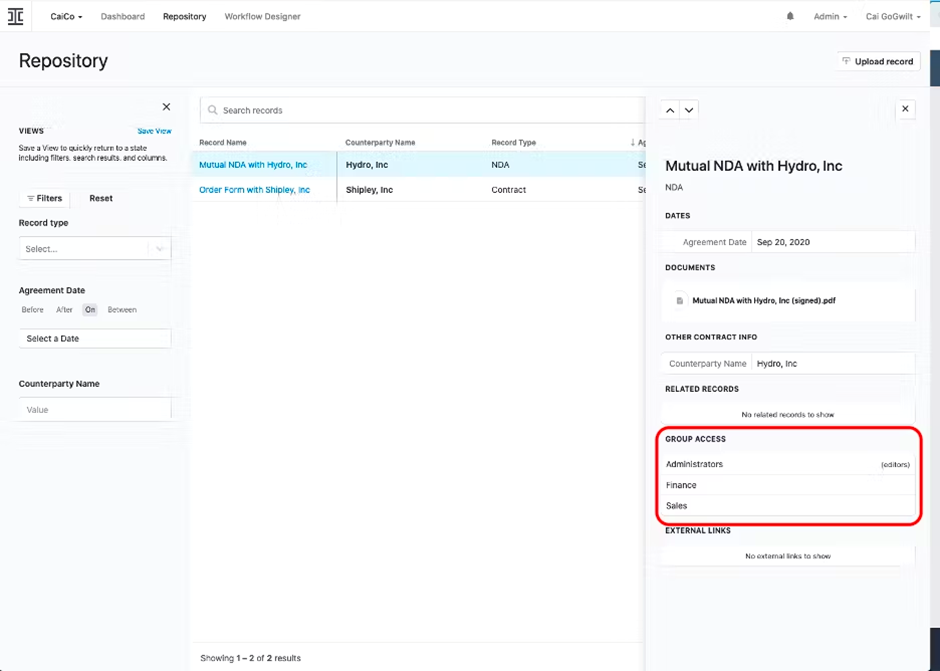
Repository Group Permissions
Administrators can grant groups of users view and edit access to different contract records. A user has edit or view access to a record if they are a member of a group with edit or view access. You can see which groups have access to a record at the bottom of the Preview Panel.
Configure Repository Group Permissions
There are two ways to configure group permissions for the Repository:
- Per-Record Permissions : Administrators can grant groups access to certain records. For example, there may be a set of NDAs that the Sales Team should have access to, and a separate set of NDAs that the Partnerships Team should have access to. Using per-record permissions, the administrator can grant each group the appropriate access.
Some groups may have record type permissions (the administrators group, for example). This is indicated by the Change Group Access button being disabled. To configure access for these groups, check out Record Type Permissions below for more information.
If you want to edit Repository permissions in bulk, check out Bulk Edit Repository Permissions.
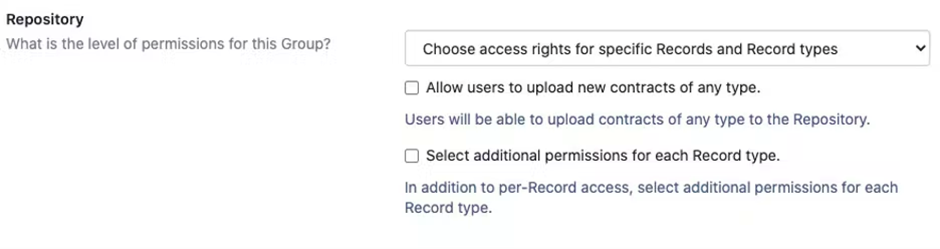
Record Type Permissions : Administrators can grant groups access to all records of a certain type. For example, they may grant view-only access to your People Operations Team for Offer Letters. They may also grant edit access to the Legal Team for all types of contracts.
In most cases, we recommend using per-record permissions since they allow for more flexibility.
Create a Contract Reminder
Contract Reminders allow you to set up weekly email reminders for any set of contracts you can filter for in the Repository using a saved view. If you delete the view that the contract reminder is associated with, the contract reminder is also deleted.
Edit a Contract Reminder
- In the left panel, select the saved view that the contract reminder is associated with.
- Click View Scheduled Reminder. You can modify or delete the reminder at a later point as well.
Workflow Designer:
Workflow Designer is a self-serve tool that works right out of the box, without long implementation times or the need for technical expertise. With a straightforward drag-and-drop user interface, users can build and launch contract generation and approval processes in minutes—not weeks or months.
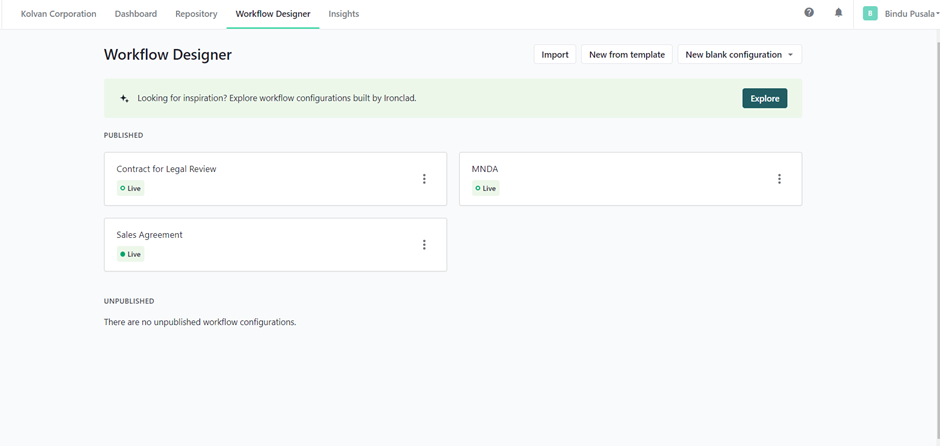
Getting Started
Start by clicking the Workflow Designer tab. Then upload and name your template.

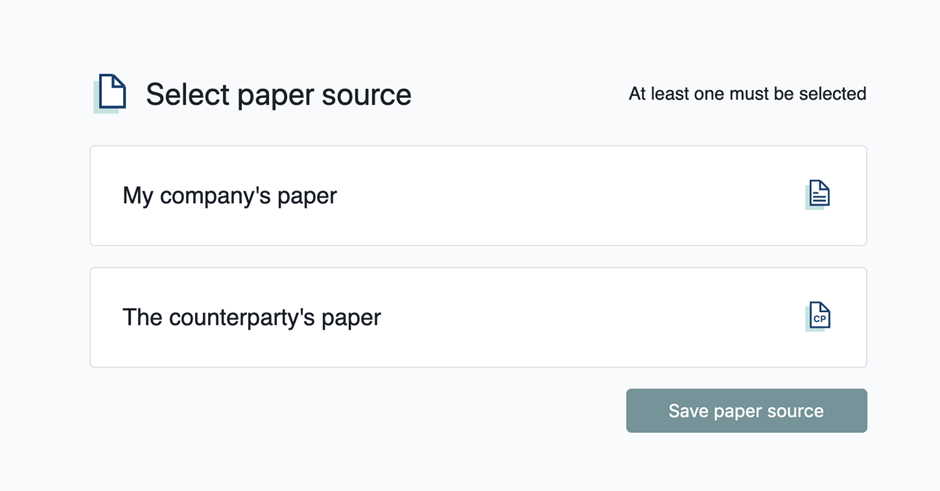
Select Paper Source
Select whether your workflow will be My company’s paper, The counterparty’s paper, or both. Once you have made that decision, click ‘Save paper source’ to proceed.
Tag Your Template
Once you’ve uploaded your template you’ll be taken to the screen where you’ll tag the document. Tagging is the process of identifying areas of the template text that Ironclad will need to replace, such as the agreement date and parties’ names.
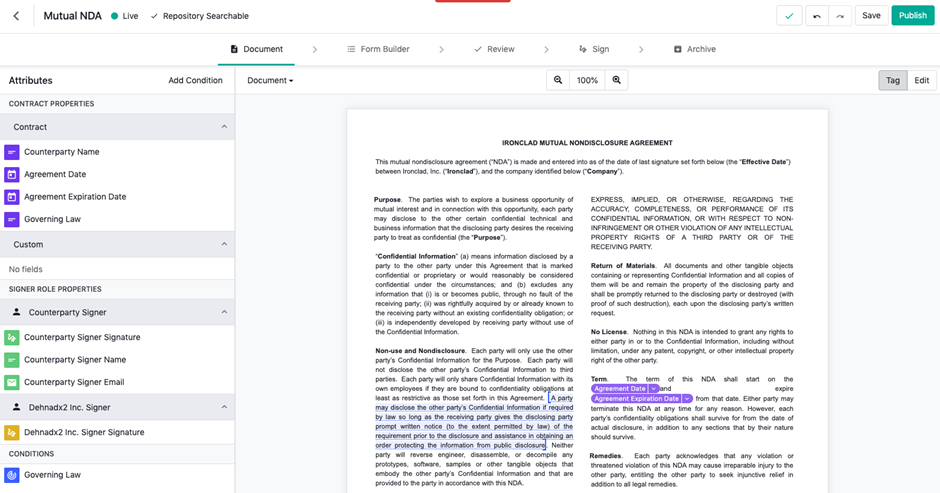
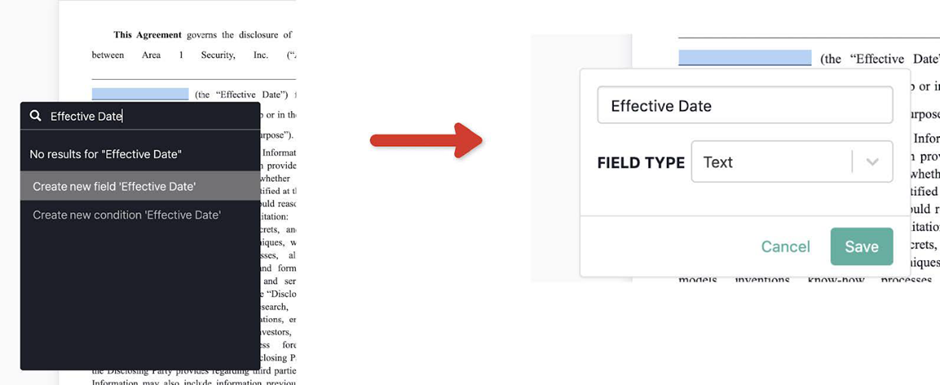
As you highlight a section of the text, you’ll see a list of fields pop up. Select the appropriate field to insert a tag.
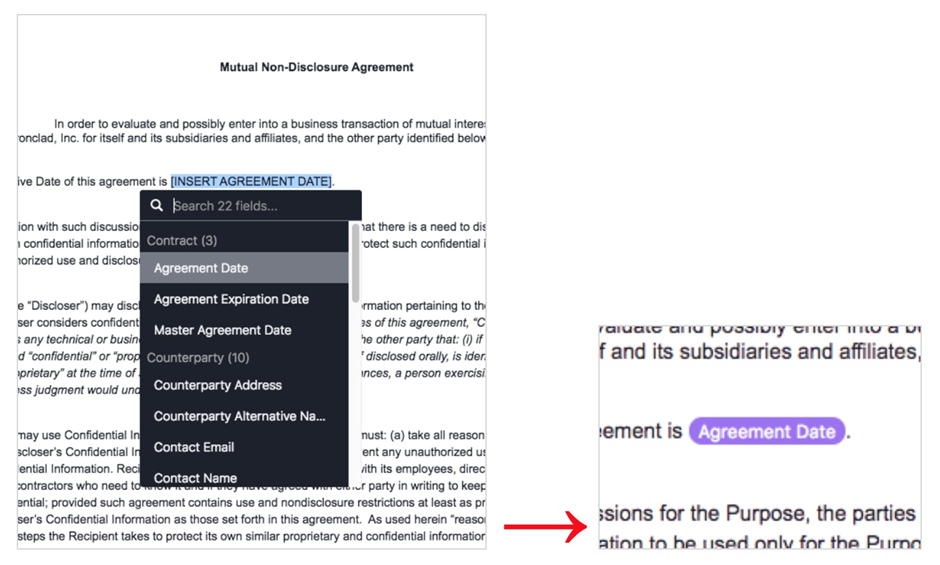
Can’t find the field you’re looking for? No problem. Just type the field name you need and select Create New Field. Also, be sure to select the appropriate field type for what you are creating.
Don’t forget to add signature fields to your templates! Your eSignature provider will recognize these tags automatically without you or someone on your team needing to prepare the document manually each time the workflow is used.
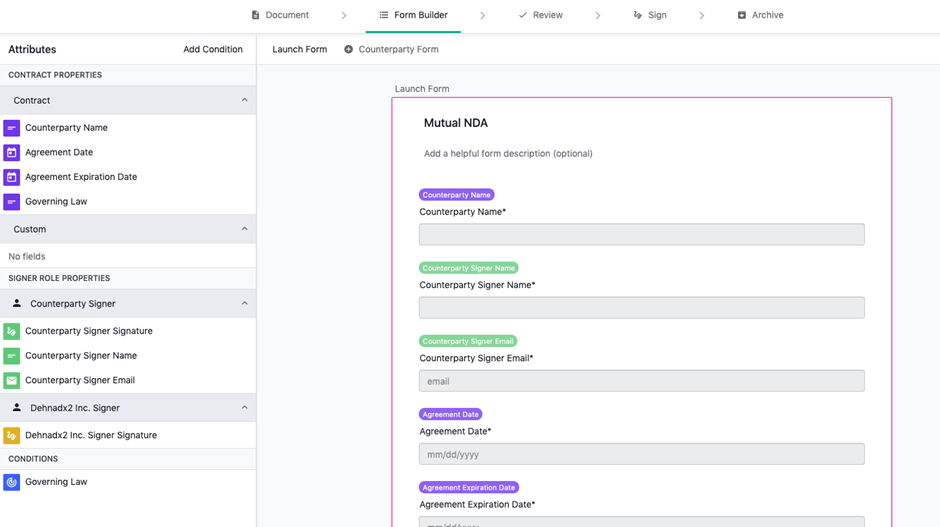
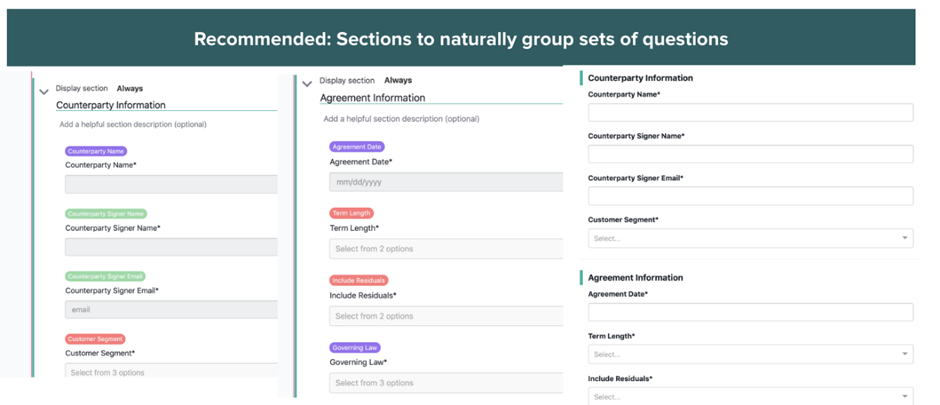
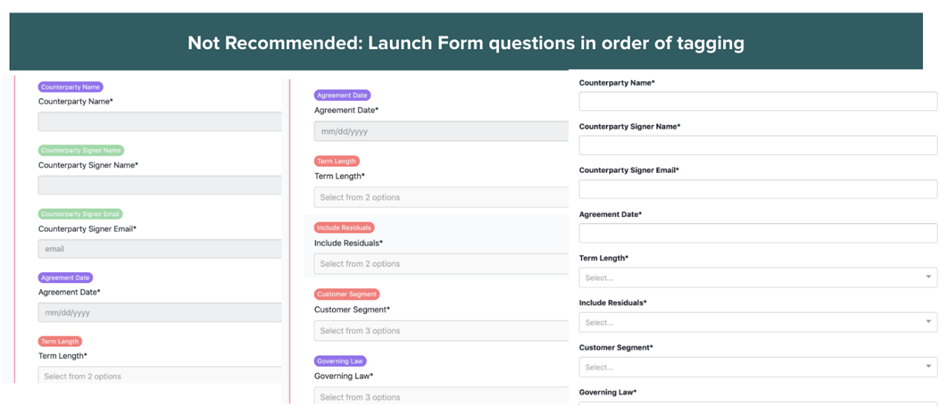
Organize Your Launch Form
Once you’ve finished tagging the template, you’re ready to prepare the Launch Form. Fields that were tagged in the template are automatically added to the Launch Form.

Assign Roles
Workflow Designer lets you configure three types of roles:
- Approvers: Assigned to review and approve contracts on the Review step of the Workflow.
- Signers: Sign on behalf of your company.
- Archivers: If a document has been manually uploaded during a workflow, the Archiver will be assigned to review and approve the final metadata.
For more information, please visit the article on Modifying Roles in Workflow Designer.
Document File Paths
Ironclad allows you to customize your file paths for saving. One of the last steps of building your workflow is to review and customize the document file paths. Under the Archive tab > File Management you can change the file paths for your document.
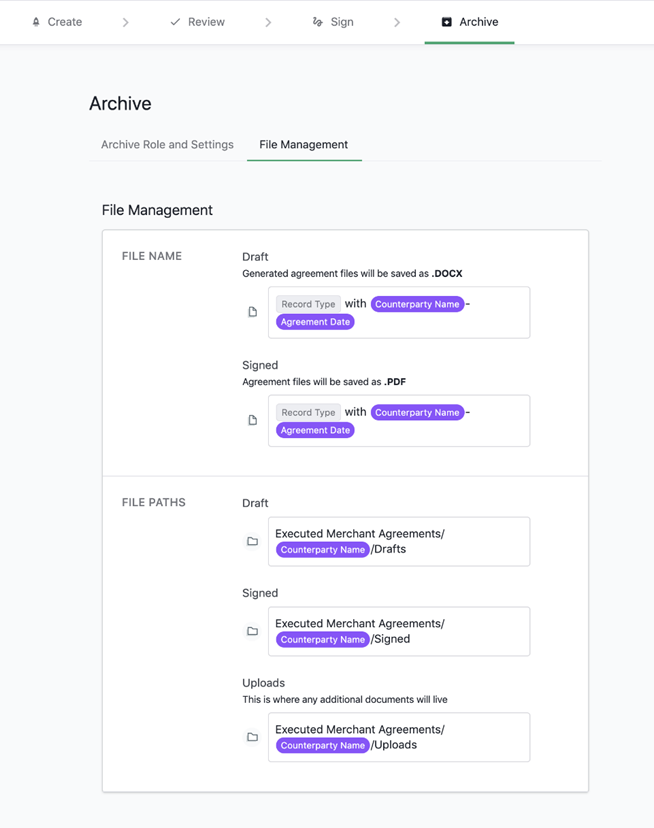
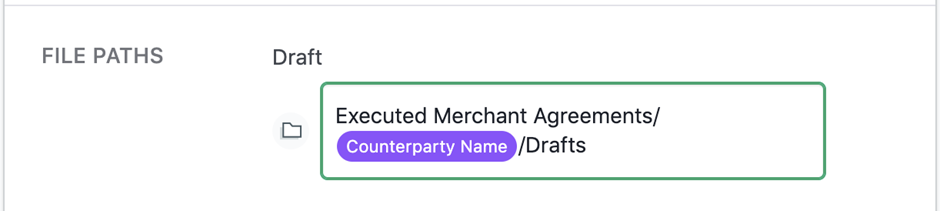
Note: The forward slash designates subsequent folders.
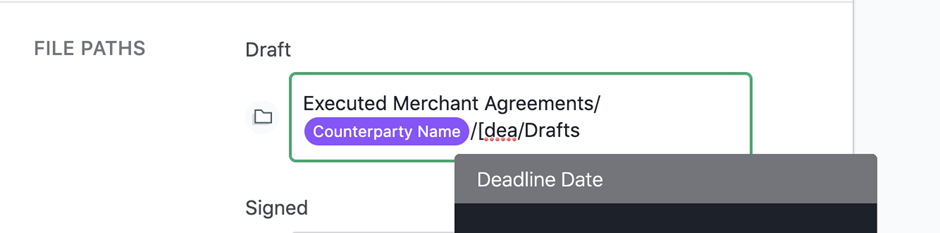
To utilize Rich Text Editor when tagging File Paths and File Names, begin with a bracket [ and begin typing to view the dropdown of available attributes:
Title Configurations
Configure your workflow title (that shows on the Start Workflow dropdown in the Dashboard) using the tag menu. Click the gear icon next to the workflow title to select between Default or Custom workflows titles.
Workflow and Record Display field, enter a title using existing tags. For example, Wonder Web Inc. wants their workflow’s title to reflect the amendment number and counterparty name. They enter the following:
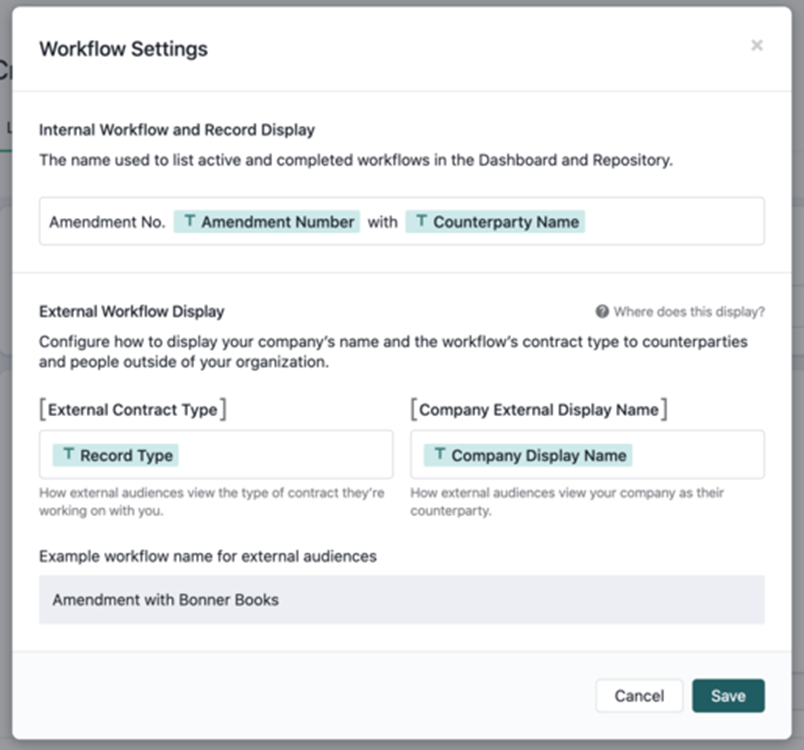
The workflow title reflects the tags’ values.

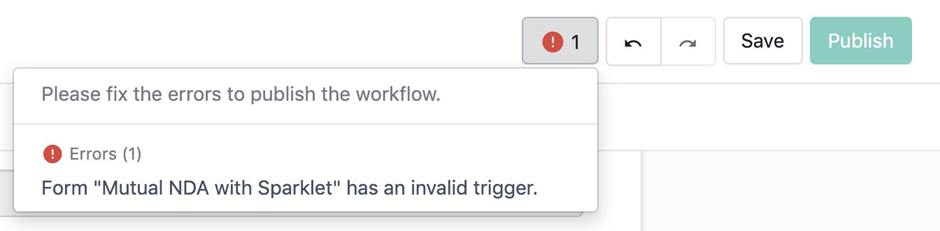
Publish
Ready to publish? First, check your guardrails if there are any errors that will prevent you from publishing your workflow for use. Warnings won’t prevent you from publishing your workflow, but it’s worth looking into what is causing that warning.

Congratulations! Once published, new workflows will appear immediately under the Start Workflow dropdown list on the Dashboard.
Ironclad Insights
Ironclad Insights is a contract analytics tool that enables you to visualize, understand, and analyze your contracts and contracting processes in real-time, without needing to export data or rely on data analysts. Insights helps you monitor performance, identify bottlenecks, and predict demand by combining contracting process metrics with the metadata contained in your contracts.
Whether you use a prebuilt or a custom chart, you can drill down to view the chart’s underlying workflows in the Dashboard. You can also export the chart as an image, PDF, or CSV.

Filter a Chart
If you are familiar with filtering Ironclad’s Dashboard, you will find the Ironclad Insights filtering process very familiar. The same filtering experience as the Dashboard can be used in Insights to generate reports for specific workflows.
Ironclad Insights shows a maximum of 15 items for a category at a time. This means that you can’t see the data/charts for more than 15 users, workflow configurations, departments, etc. at a time. To view the data for a specific item in your selected category, select the matching filter from the filters dropdown.
For example, if you chart the in-progress workflows and select workflow configuration as the category, to view the data for a workflow configuration that is not in the top 15, you must click the filters dropdown, add a filter, select the workflow configuration, and then select the workflow configuration you want to view the data for.
Drill Down
You can drill down to the list of workflows the chart data is based off of, as a report in the Dashboard. To drill down, you must click on the piece of data in the chart you want to view in more detail. Click View Workflows in Dashboard, and then save the generated view in the Dashboard to view the associated workflows.
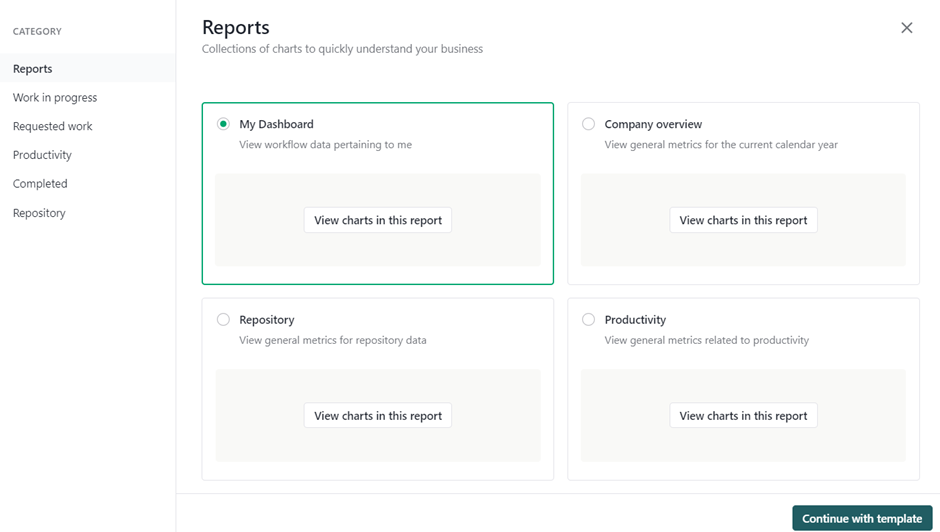
You can also view the entire chart as a view in the Dashboard by clicking the three stacked dots icon located in the top right of the chart, and then click View data in dashboard.
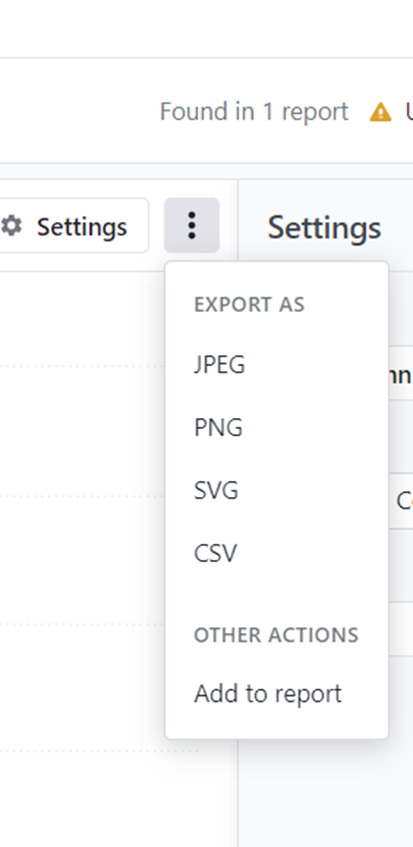
Export Chart
To share the reports and charts generated using Insights with other stakeholders in the organization, you can export the charts in different image formats like JPEG, PNG, and SVG.
Custom Charts
You can build custom charts using your contract and contracting processes as the framework. There are a variety of actions you can take take to build a custom chart:
- You can change the group by category to any contract metadata in your instance.
- You can use a custom aggregation method on any contract metadata to form the range on the Y-Axis of the chart.
- You can customize the date reference and resolution for Timeseries and Cumulative Timeseries Charts.
- You can filter your charts using all contract data, similar to how you do it on the Dashboard today.
When you build a custom chart, you must choose the type of chart you want to view.