Uncategorized

How to install and configure Logik.io?
Download & Install:
- How to Install Logik.IO for Salesforce CPQ
- Go to the Salesforce app exchange and search for logik.IO in the quick find box.
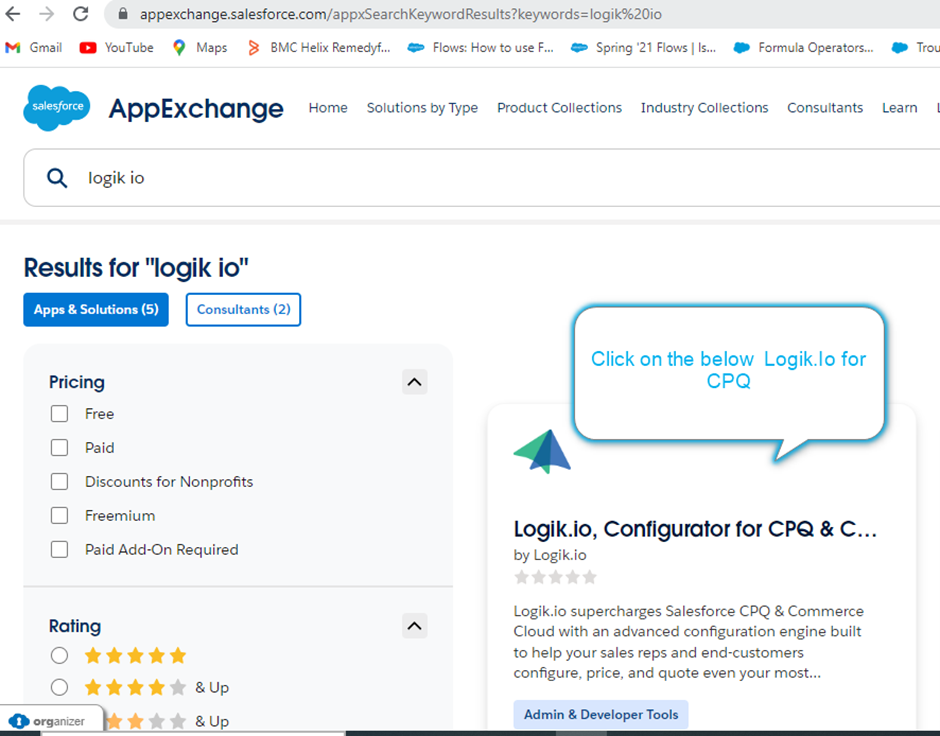
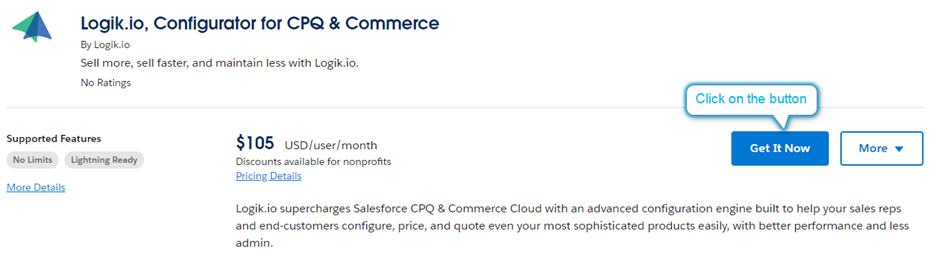
- Another page will be open with an option “Get It Now”
- Open up with a new window asking for Salesforce-connected accounts and where to install either in production or Sandbox.

- Here enter your Salesforce org account credential details where CPQ package is installed.
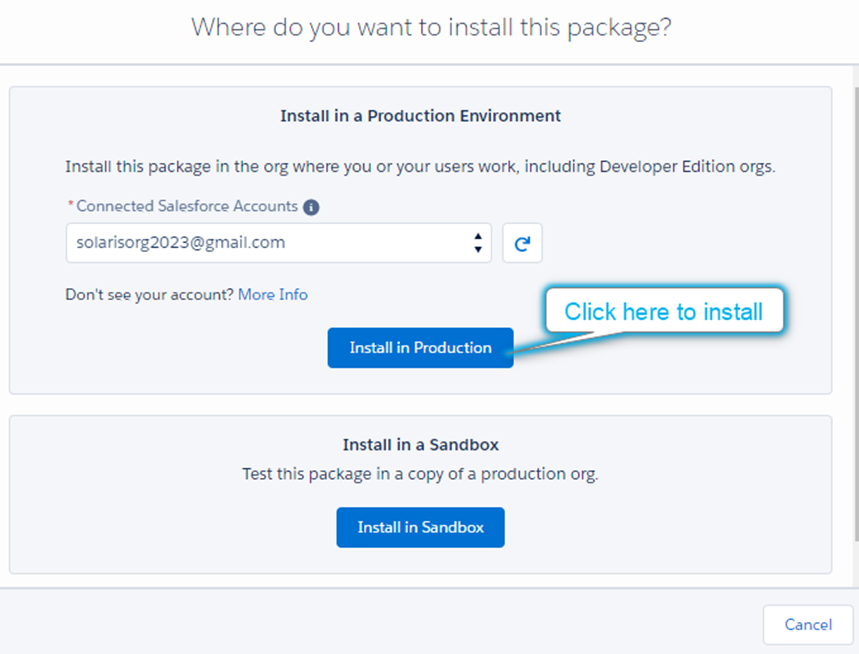
- After clicking “Install in Production” it will ask for confirmed installation details.
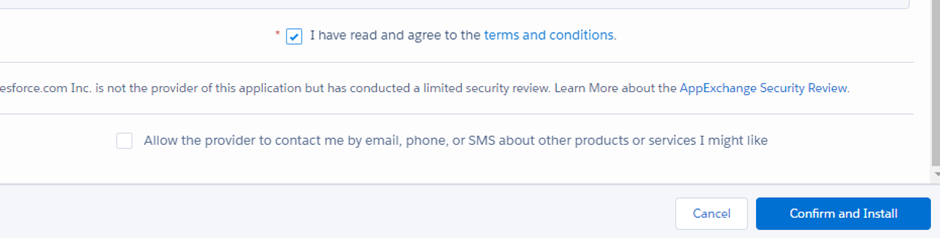
- Check the check box and Click on “Confirm and Install ” to proceed.

- Now you will get the above message on the page and redirect to the salesforce login page.
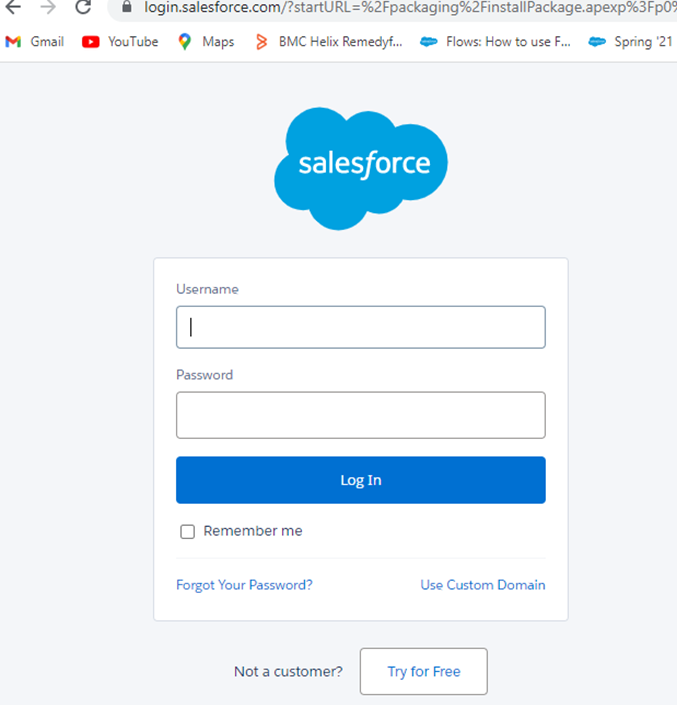
- Enter your Salesforce Org details to proceed and after logging, a window will open asking for the installation key.
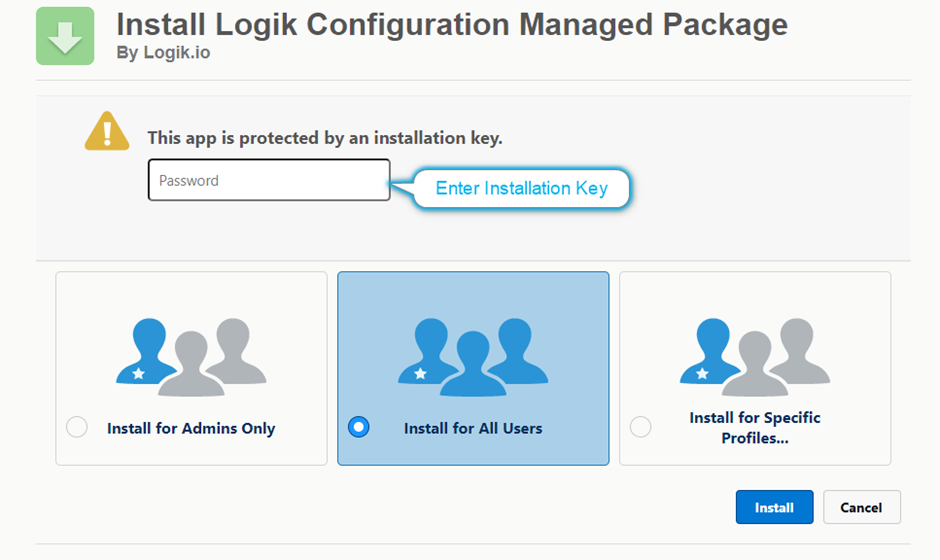
- Enter the installation key and select the required one and click install.
- It may take some time to get the confirmation email after installation.
- Click on set up and search for the Installed package then you should see the Logik.IO package if the package is successfully installed. Refer to the below image.

Configuration:
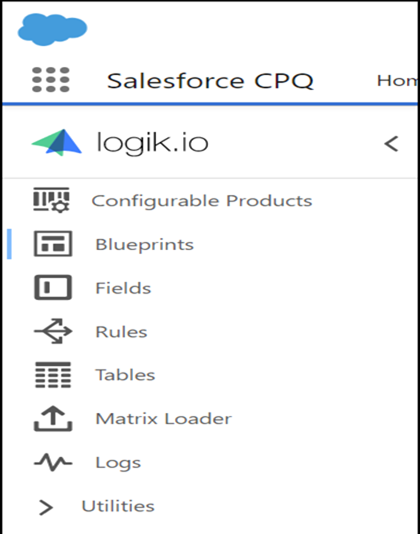
It does not have the option to configure at the package level like we do for Salesforce CPQ. In order to use the functionality of external connections we need to contact the support team to get access.
Example/Output
In this example, we are trying to configure Ice cream for the vendor (Sample Use)
- Log in to the environment where Logik.Io is installed.
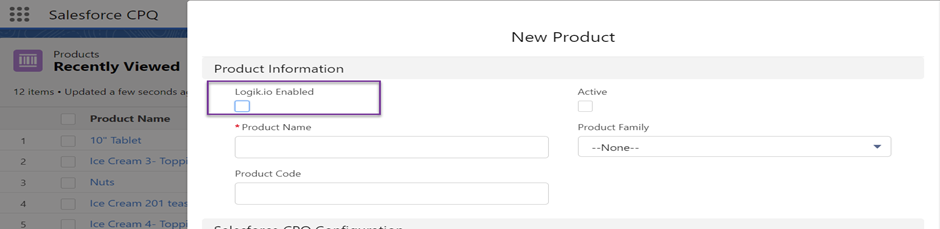
- Create a product that needs to configure with logik.io that can be differentiated by checking the check box available on the product detailed page.
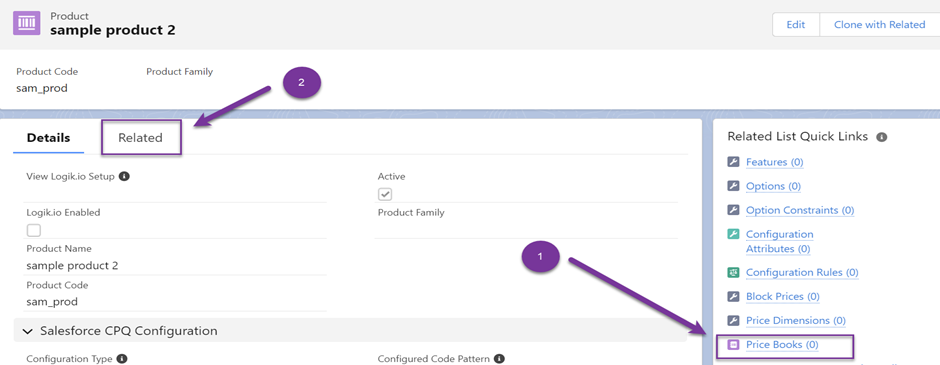
- After creating the product go to the related list and add price book.
- Create a list view for Logik.Io products.
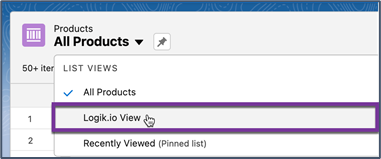
- Search for a product and click on “Click Here”

- After clicking that a configuration page will be opened with following below information.

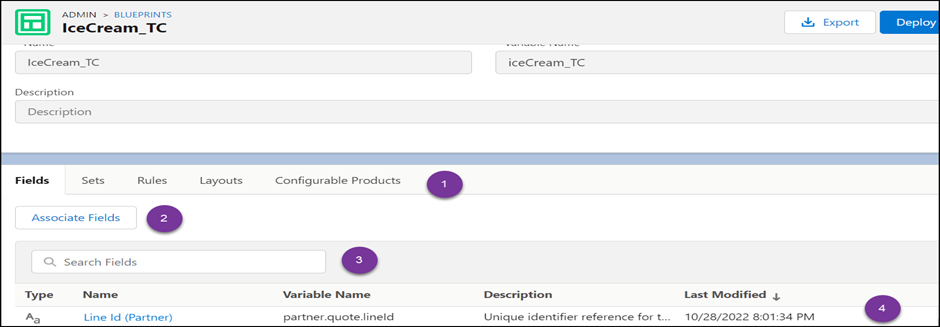
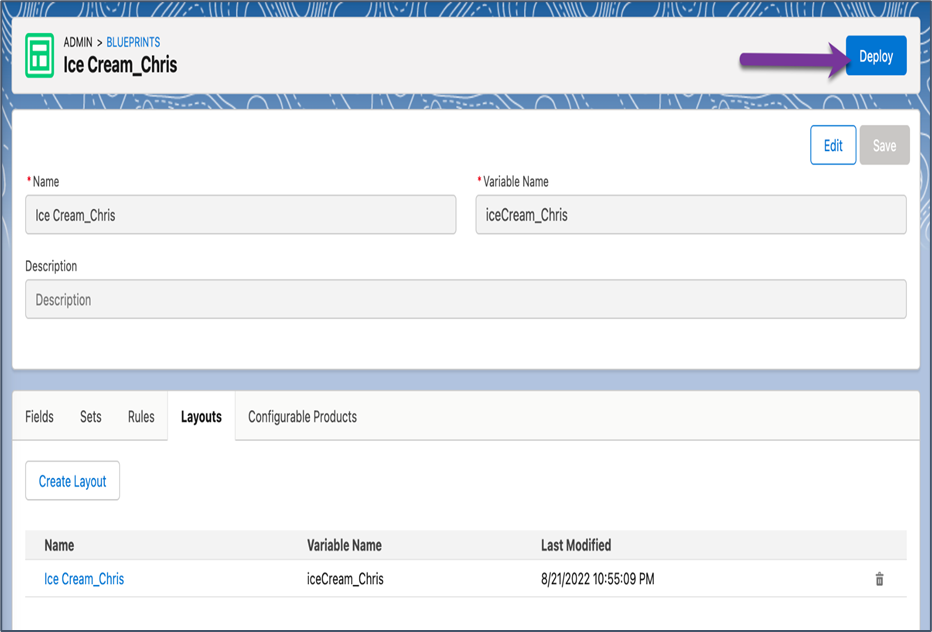
- At present no blueprint is associated and it is required to create a blueprint then only deployment is possible. Here I am referring to the blueprint “IceCream_TC”.
- The configurable product tells Logik which blueprint configuration to serve based on the selected Products.
- Create the fields based on what criteria products to be configured.
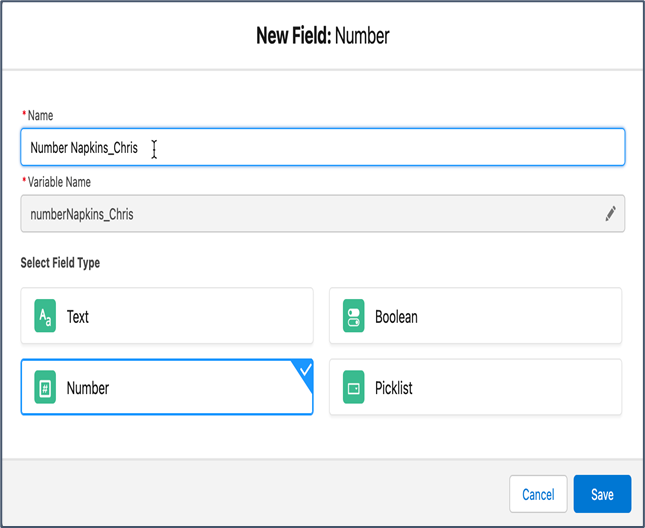
- Repeat the above step for creating ”Cup/Cone/Sundae” ,” Number of Guests” , and” Number of Scoops”.
- Associate the created fields to the blueprint.
- We can add layout to the blueprint that layout fields arranged in the layout that will be the same in UI.
- We can also download the layout as a file in CSV format.
- Click on rules which are available in the blueprint definition page and check for which rule needs to be fired for this blueprint.
- Click on Configurable products and check the products all to be configured are available or not.
- After completion of all configurations and it is time for the deployment and Click on the “deploy” button it is available on the blueprint detail page.
- Now go to “Quote” and Click on Edit lines.
- Search for Logik.Io product in the search box and click on select then a new page will open as displayed below.
- This is the step that shows the difference between the native Salesforce CPQ and Logik.IO configurator.
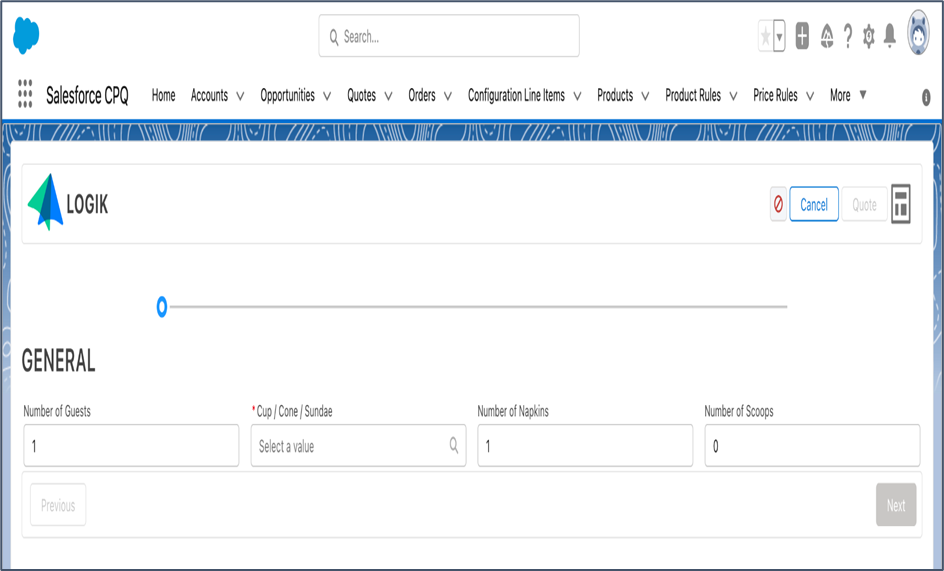
Give the input in the above fields and add the product to quote and save the quote.
Nikhita Mandava
0